GeoServer Blog
How to create Tile Layers with GeoServer
GeoSpatial Techno is a startup focused on geospatial information that is providing e-learning courses to enhance the knowledge of geospatial information users, students, and other startups. The main approach of this startup is providing quality, valid specialized training in the field of geospatial information.
( YouTube | LinkedIn | Facebook | X )
How to create Tile Layers with GeoServer
In this session, we will explore “How to create Tile Layers with GeoServer”. If you want to access the complete tutorial, simply click on the link.

Introduction
GeoWebCache is a tiling server that acts as a proxy between a map client and map server, caching tiles to save processing time. It is integrated with GeoServer and can significantly improve the responsiveness and reliability of the server. These settings can be accessed from the left side of the screen under the Tile Caching heading. They include:
- Tile Layers: This section lists all cached layers for review and parameter modification.
- Caching Defaults: Caching Defaults is the entry point for these.
- Gridsets: This option allows you to create new tiling schemes or modify the existing ones.
- Disk Quota: The Disk Quota and BlobStores options allow you to set predefined amounts of disk space for each layer.
Tile Layers
The tile layers menu shows a listing of all of the layers known to the integrated GeoWebCache. It is similar to the Layer Preview for GeoWebCache, with many of the same options that you can review the status and the main parameters for each layer. For each layer cached by GeoWebCache, the following information is available:
- Type and Layer Name: These columns display the type of layer and the name value of each.
- Disk Quota: The maximum amount of disk space that can be used for this layer. This feature cannot be configured in GeoServer as in the GeoWebCache standalone version, so you can only see the N/A value here.
- Disk Used: The current disk space being used by tiles for this particular layer. This counter will only be updated if disk quotas are enabled.
- Enabled: Indicates whether tile caching is enabled for this layer. It is possible to have a layer definition here but not to have tile caching enabled (set in the layer properties).
- Preview: Similar to Layer Preview, this will generate a simple OpenLayers application populated with tiles from one of the available gridset/image format combinations.
- Actions: Actions have two options, Seed/Truncate and Empty link.
- Seed/Truncate: Opens the GeoWebCache page for automatically seeding and truncating the tile cache. Use this if you want to pre-populate some of your cache.
- Empty: This removes all saved tiles from the cache and is identical to a full truncate operation for the layer.
- Empty All: This link lets you clear the entire cache for all layers, gridsets and filter parameter combinations. Note that, This will truncate all layers in GeoWebCache.
Adding or removing cached layers
We have used the GeoWebCache to store tiles generated by user requests, but you can also precompute tiles for a layer to avoid delays for some users. The process of pre-computing tiles is called seeding. This section will help you understand how it works:
- Navigate to the Tile Caching > Tile Layers page and click on the Seed/Truncate link for your desired layer.
- Scroll to the Create a new task section and set the parameters for seeding. For the number of parallel processes (threads) that will request maps from GeoServer, it’s best to select a number of threads equal to “50” percent of the available cores on your server.
- From the
Operation Typeyou have a few options: Seed, Reseed and Truncate. Select Seed to generate missing tiles or Reseed to regenerate all tiles. Truncate allows you to select specific zoom levels to remove, unlike the Clear operation, which removes all tiles. - You must select a
gridsetand animage formatto seed. If you want to precompute cache for more than one gridset and/or image format, you can start another operation immediately after this one. - To start seeding, select a subset of the gridset, specify a level range and an area. If no specific area is needed, leave the
Bounding Boxempty. SelectZoom StartandZoom Stop, then press Submit to start seeding. - The web interface displays a list of running tasks, which can be filtered by layer and stopped if necessary. Refreshing the list shows the number of tiles completed, time elapsed, and time remaining. Seeding multiple layers can be resource intensive and time consuming.
- When tasks are completed, check for an empty list. Return to the Tile Layers page to see a significant increase in the amount of disk space allocated for your layer’s tiles. Seeding your layers can greatly improve performance, as map requests will now hit the cache in the precomputed layer range. Expect a 10- to 90-fold increase in performance.
Tiles can be generated by GeoWebCache in two ways: on-demand during map viewing, or by seeding in advance. On-demand caching speeds up subsequent views, but reduces the quality of the user experience. Seeding improves the user experience but is time and disk consuming. Typically, a combination of both methods is used, with popular areas or zoom levels seeded and less frequently viewed tiles left uncached.
Disk Quota
The Disk Quotas page lets you manage disk usage for cached tiles and set a global disk quota. By default, disk usage for cached tiles is unlimited, but setting a quota can prevent disk capacity issues, especially with Direct WMS integration. This is important for serving large areas with terabytes of tile cache on disk. The following information is displayed on the Disk Quota page:
- Enable disk quota: When enabled, the disk quota will be set according to the options listed below. The setting is disabled by default.
- Disk quota check frequency: This setting determines how often the cache is polled for any overage. Smaller values (more frequent polling) will slightly increase disk activity, but larger values (less frequent polling) may cause the disk quota to be temporarily exceeded. The default is 10 seconds.
- Maximum tile cache size: The maximum size for the cache. When this value is exceeded and the cache is polled, tiles will be removed according to the policy. Note that the unit options are MegaBytes, GigaBytes and TeraBytes. The default is 500 MiB.
- Tile removal policy: When disk quota is exceeded, choose between Least Frequently Used or Least Recently Used policy to delete tiles based on access frequency or date last accessed. Optimal configuration varies based on data and server usage.
- Disk quota store type: GeoServer uses the H2 database for disk quotas by default, with the option to configure an external database. You can choose an in-process database with a local H2 database or an external database with H2, PostgreSQL or Oracle. Don’t forget to press Submit after making changes.
In this session, we explored “How to create Tile Layers with GeoServer”. If you want to access the complete tutorial, simply click on the link.
GeoServer 2.24.3 Release
GeoServer 2.24.3 release is now available with downloads (bin, war, windows), along with docs and extensions.
This is a maintenance release of GeoServer providing existing installations with minor updates and bug fixes. GeoServer 2.24.3 is made in conjunction with GeoTools 30.3, and GeoWebCache 1.24.3.
Thanks to Andrea Aime (GeoSolutions) for making this release.
Release notes
New Feature:
- GEOS-11077 Implement Requirement Class “Search” from OGC API - Features Part 5 proposal
- GEOS-11225 [AuthKey] AuthKey synchronize the user/group automatically
- GEOS-11267 csw-iso: multiple mappings should also have multiple queryable mappings
- GEOS-11279 metadata: allow same field on multiple tabs
Improvement:
- GEOS-11260 JNDI tutorial uses outdated syntax
- GEOS-11276 Use style_body to define CSS style for a layer
- GEOS-11288 Improve input validation in ClasspathPublisher
- GEOS-11306 Java 17 does not support GetFeature lazy JDBC count(*)
- GEOS-11327 Add warning about using embedded data directories
- GEOS-11329 Update MapML viewer to release 0.13.0
- GEOS-11334 Update MapML viewer to release 0.13.1
- GEOS-11342 STAC should exclude items when the collection in path is wrong
- GEOS-11347 STAC Landing Page links should include root link
- GEOS-11359 Update MapML viewer to release 0.13.2
Bug:
- GEOS-11174 GWC rest api returns erroneous truncated response when gzip http encoding is enabled
- GEOS-11205 Layer page: style image fails if it is in isolated workspace
- GEOS-11236 WFS 2.0.0/GetFeature - Shapefile - “We have had issues trying to flip axis”
- GEOS-11256 Cannot retrieve LegendGraphic from a PostGIS datastore with ‘hideEmptyRules’ and ‘Support on the fly geometry simplification’ enabled
- GEOS-11263 hideEmptyRules not working in JSON LegendGraphic
- GEOS-11266 csw-iso: missing fields in summary response
- GEOS-11278 metadata: only selected tab is submitted
- GEOS-11285 GWC REST Content-Encoding gzip returns broken response
- GEOS-11290 With Oauth enabled, anon users get random auth requests
- GEOS-11291 GeoFence: Cleanup stale log4j references
- GEOS-11299 Performance regression in GeoJSON output generated in EPSG:900913
- GEOS-11312 Inconsistent Memory Units in Legend Image Creation
- GEOS-11335 A layer in an authority other than EPSG may fail to reload after restart
Task:
- GEOS-11307 Update apache-commons-lang3 to version 3.14.0 for Java 17 and Java 21 support
- GEOS-11316 Update Spring version to 5.3.32
- GEOS-11360 Upgrade Apache POI from 4.1.1 to 5.2.5
- GEOS-11362 Upgrade Spring libs from 5.3.32 to 5.3.33
For the complete list see 2.24.3 release notes.
Community Updates
Community module development:
- GEOS-11305 Add layer information in the models backing STAC
- GEOS-11330 OAuth2 kid verification should be optional
- GEOS-11339 Introducing the Features Autopopulate Community Plugin
- GEOS-11340 WFS Freemarker HTML Outputformat
- GEOS-11345 STAC Conformance URIs need to be updated to v1.0.0
- GEOS-11348 JMS cluster does not allow to publish style via REST “2 step” approach
- GEOS-11358 Feature-Autopopulate Update operation does not apply the Update Element filter
Community modules are shared as source code to encourage collaboration. If a topic being explored is of interest to you, please contact the module developer to offer assistance.
About GeoServer 2.24 Series
Additional information on GeoServer 2.24 series:
- GeoServer 2.24 User Manual
- Control remote HTTP requests sent by GeoTools/GeoServer
- State of GeoServer 2.24.1 (foss4g-asia presentation)
- Multiple CRS authority support, planetary CRS
- Extensive GeoServer Printing improvements
- Upgraded security policy
Release notes: ( 2.24.3 | 2.24.2 | 2.24.1 | 2.24.0 | 2.24-RC )
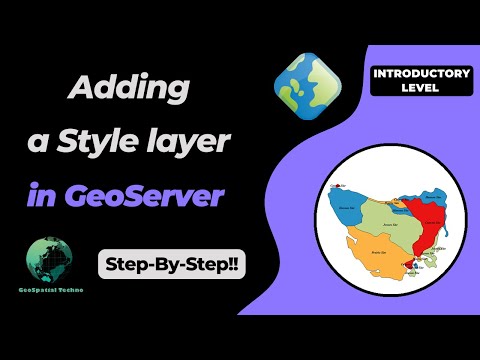
How to style layers using GeoServer and QGIS
GeoSpatial Techno is a startup focused on geospatial information that is providing e-learning courses to enhance the knowledge of geospatial information users, students, and other startups. The main approach of this startup is providing quality, valid specialized training in the field of geospatial information.
( YouTube | LinkedIn | Facebook | X )
Using GeoServer and QGIS to style a layer
In this session, we will explore “How to style layers using GeoServer and QGIS” to produce beautiful maps. If you want to access the complete tutorial, simply click on the link
Introduction
Geospatial data has no intrinsic visual component and it must be styled to be visually represented on a map. By default, GeoServer uses a markup language called Styled Layer Descriptor (SLD) to define styling rules for displaying data. SLD is an XML-based language that allows users and software to control the visual portrayal of geospatial data. This language ensures that clients and servers can both understand how to render the data visually.
Note. This video was recorded on GeoServer 2.20.0, which is not the most up-to-date version. Currently, versions 2.24.x and 2.25.x are supported. To ensure you have the latest release, please visit geoserver.org and avoid using older versions of GeoServer.
Add a Style
To add a new style, navigate to the Data > Styles page, then click on the Add a new style link. You will be redirected to the new style page, which is the same as the Style Editor Data tab.
This tab includes basic style information, the ability to generate a style and legend details. It has some mandatory basic style information, such as:
- Name: It’s the name of the style and it must be a unique name.
- Workspace: Styles can be inside workspaces which causes restrictions. In other words, the styles in a workspace can only be assigned to the services of that, and other services outside it, cannot use these styles. Styles also can be “global” or no workspace, so they don’t have any restrictions and services can be used for all suitable styles.
- Format: Default options are SLD and ZIP formats. To use other formats such as CSS and YSLD, you should download and install extensions. Make sure to match the version of the extension to the version of the GeoServer.
The “Style Content” area provides options for creating, copying, or uploading a style. It has three options:
- Generate a default style: Choose a generic style based on geometry such as Point, Line, Polygon, Raster, or Generic and click the Generate link when selected.
- Copy from existing style: Select an existing style from GeoServer and copy its contents to the current style. Note that not all styles may be compatible with all layers. Click the Copy link when selected.
- Upload a style file: Press the Browse button to locate and select a plain text file from your local system to add as the style. Click on the Upload link to add the style file.
The Legend area allows you to preview the legend for the style. Click on the Preview legend link to generate a legend based on the current settings.
At the bottom of the Style Editor page, you’ll find several options: Validate, Apply, Save and Cancel. During editing and especially after editing is complete, you can check the validation of the syntax by pressing the Validate button at the bottom. If any validation errors are found, a red message is displayed, and if no errors are found, a green message is displayed. To make changes, press the Apply button to access all the tabs and finally press the Save button.
After having created the style, it’s time to apply it to the layer. To do it, follow these steps:
- Navigate to the Data > Layers page then click on the layer’s name link to open the layer’s properties form. Switch to the Publishing tab.
- Go to the Style section and from the Default Style list, select the suitable style, then press the Save button.
- Navigate to the **Data > Layer Preview ** page and open up OpenLayers preview for the layer.
Edit a Style
On the Styles page, click on the style name to open the Style Editor. The Style Editor page presents the style definition and contains four tabs with many configuration options: Data , Publishing , Layer Preview and Layer Attributes.
- Data tab: The Data tab includes basic style information, the ability to generate a style, and legend details. Moreover, it allows for direct editing of style definitions at the bottom, with support for line numbering, automatic indentation, and real-time syntax highlighting. You can switch between tabs to create and edit styles easily and can adjust the font size of the editor.
- Publishing tab: This tab shows all layers available on the server, along with their default style and any additional styles they may have. You can easily see which layers are linked to the current style by checking a box in the table.
- Layer Preview tab: This tab enables you to preview and edit the current style of any layer without switching pages. You can easily select the desired layer to preview and fine-tune styles to continuously test visualization changes.
- Layer Attributes tab: The Layer Attributes tab shows a list of attributes for the selected layer, making it easy to see and work with the attributes associated with the layer. This can help in deciding which attribute to use for labeling or setting up scale-dependent rules.
Creating SLD styles by QGIS
QGIS has a style editor for map rendering with various possibilities, including the export of raster styles to SLD for use in GeoServer. For versions before 3.4.5, a plugin called SLD4raster is required for exporting SLD for use in GeoServer.
Here’s a simple guide to styling a vector layer in GeoServer:
- Open QGIS (minimum version 3.0) and loading the vector dataset into your project.
- Double click on the layer to open the Properties dialog and navigate to the Symbology page.
- Select a Graduated rendering, choose the desired column, and press the Classify button.
- Return to the Properties dialog and go to the bottom of the Styles page. Select Style > Save Style.
- Save the style in SLD format and choose the location for the file.
- Use the Choose File button to locate your exported file in the folder and select it.
- Click on the Upload link to load the file into the editor form.
- Press the Validate button to ensure there are no errors, then press the Save button.
- Switch to the Publishing tab and choose either Default or Associated checkbox to apply the new style to the desired layer.
Here is a step by step guide to style a raster layer for GeoServer:
- Begin by opening QGIS with a minimum version of 3.4.5.
- Load the raster layer into your project.
- Double click on the layer to access the Properties and go to the Symbology tab.
- Select Singleband pseudocolor as the Render type, choose Linear method for Interpolation, and select a desired Color ramp.
- Press the Classify button to create a new color classification, then press the Apply button to save this classification. At the bottom-left of the page, choose Style and press Save Style button.
- Choose a name and export it in SLD format to your preferred location.
- In GeoServer, navigate to the Style section and click on Add a new style to open the editor form.
- Use the Choose File button to locate your exported file in the folder and select it.
- Click on the Upload link to load the file into the editor form.
- Validate the style by pressing the Validate button to ensure there are no errors, then press the Save button.
- Navigate to Data > Layers page and open the layer’s properties form by clicking on the layer’s name. Switch to the Publishing tab.
- Set the style as Default Style and press the Save button.
- Finally, in the Layer Preview section, open the OpenLayers preview for the raster layer.
Remove a Style
To remove a style, click on the checkbox next to the style. Multiple styles can be selected at the same time. Press the Remove selected style(s) button at the top of the page. You will be asked for confirmation and press the OK button to remove the selected style(s).
In this session, we explored “How to style layers using GeoServer and QGIS” to produce beautiful maps. If you want to access the complete tutorial, simply click on the link
GeoServer 2.25.0 Release
GeoServer 2.25.0 release is now available with downloads (bin, war, windows), along with docs and extensions.
This is a stable release of GeoServer recommended for production use. GeoServer 2.25.0 is made in conjunction with GeoTools 31.0, and GeoWebCache 1.25.0.
Thanks to Peter Smythe for making this release. Thanks to Levy Steve, Peter Smythe, Jody Garnett, and Mark Prins for testing the 2.25.0 release.
Security Considerations
This release addresses several security vulnerabilities, all of which require admin access.
- If you have updated to GeoServer 2.24.2 Release or GeoServer 2.23.5 Release you are already patched.
- If you are working with a commercial support provider that volunteers with the geoserver-security email list they are already informed.
Vulnerabilities:
- CVE-2023-51444 Arbitrary file upload vulnerability in REST Coverage Store API (High).
- CVE-2023-41877 GeoServer log file path traversal vulnerability (High).
- CVE-2024-23634 Arbitrary file renaming vulnerability in REST Coverage/Data Store API (Moderate).
- CVE-2024-23643 Stored Cross-Site Scripting (XSS) vulnerability in GWC Seed Form (Moderate).
- CVE-2024-23821 Stored Cross-Site Scripting (XSS) vulnerability in GWC Demos Page (Moderate).
- CVE-2024-23819 Stored Cross-Site Scripting (XSS) vulnerability in MapML HTML Page (Moderate).
- CVE-2024-23818 Stored Cross-Site Scripting (XSS) vulnerability in WMS OpenLayers Format (Moderate).
- CVE-2024-23642 Stored Cross-Site Scripting (XSS) vulnerability in Simple SVG Renderer (Moderate).
- CVE-2024-23640 Stored Cross-Site Scripting (XSS) vulnerability in Style Publisher (Moderate).
- CVE-2023-51445 Stored Cross-Site Scripting (XSS) vulnerability in REST Resources API (Moderate).
We would like to thank everyone who contributed to reporting, verifying and fixing the above vulnerabilities (see each CVE for appropriate credits). A special thank you to Steve Ikeoka for reporting most of the issues and doing the majority of the actual fixes.
The use of the CVE system allows the GeoServer team to reach a wider audience than blog posts. See the project security policy for more information on how security vulnerabilities are managed.
Upgrade Notes
We have a number of configuration changes when updating an existing system:
-
The longstanding
ENTITY_RESOLUTION_ALLOWLISTsetting has been recommended as a way to control the locations available for external entity resolution when parsing XML documents and requests.The default has changed from
*(allowing any location) to allowing the recommendedwww.w3.org,schemas.opengis.net,www.opengis.netlocations used for OGC Web Services, along with theinspire.ec.europa.eu/schemaslocation used by our friends in Europe. -
The FreeMarker Template HTML Auto-escaping is now enabled by default.
-
The spring security firewall is now enabled by default.
-
A new configuration setting is available to limit content served from the
geoserver/wwwfolder.If you have not met the
wwwfolder before it is used to share content, and there is a tutorial serving static files. -
We do add recommendations to production considerations over time, if you have not checked that page in a while please review.
Thanks to Steve Ikeoka and Jody Garnett for these improvements.
JTS fast polygon intersection enabled by default
The JTS Next Generation polygon intersection algorithm has been enabled by default, which will improve performance of a number of operations, including WPS processes and the vector tiles generation.
We deem the functionality well tested enough that it should be opened to the majority of users, even if it’s still possible to turn it off by adding the -Djts.overlay=old.

MapML Extension
The MapML extension is receiving a number of updates and improvements, with more to come in the following months. It’s now possible to declare “Tiled CRS” as the CRS for a layer, with the implication not just of the CRS, but also of the gridset that will be used by the MapML viewer:

This portion builds on top of the work done months ago to support astronomical CRSs, which allows GeoServer to support multiple CRS authorities.
The MapML preview links are now using the new MapML output format, while the old dedicated REST controller has been removed. This allows for better integration of the MapML format in the GeoServer ecosystem. The MapML viewer has also been updated to the latest version:

Thanks to Joseph Miller and Andrea Aime (GeoSolutions) for this work, and Natural Resources Canada for sponsoring it.
Community Module Updates
Much of the new activity in GeoServer starts as a community module. We’d like to remind you that these modules are not yet supported, and invite you to join the effort by participating in their development, as well as testing them and providing feedback.
Raster Attribute Table community module
Developed as part of GEOS-11175, the Raster Attribute Table community module uses the GDAL Raster Attribute Table (RAT) to provide a way to associate attribute information for individual pixel values within the raster, to create styles as well as to provide a richer GetFeatureInfo output.


For more information see the user guide.
We’d like to thank Andrea Aime (GeoSolutions) for the development and NOAA for sponsoring.
Graticules for WMS maps
The graticules community module, developed as part of GEOS-11216, provides a datastore generating graticules for WMS maps, along with a rendering transformation that can be used to label them. The module can be used to draw a graticule in WMS maps, as well as to download them as part of WFS (or in combination with the WPS download module).


We’d like to thank Ian Turton for development and GeoSolutions for sponsoring the work.
GeoServer monitor Kafka storage
The monitoring Kafka storage module, developed as part of GEOS-11150, allows storing the requests captured by the monitoring extension into a Kafka topic.

We’d like to thank Simon Hofer for sharing his work with the community. To learn more about the module, how to install and use it, see the user-guide.
JWT Headers
The JWT headers module has been developed as part of GEOS-11317.
![]()
The module is a new authentication filter that can read JWT Headers, as well as general JSON payloads and simple strings, to identify a user, as well as to extract their roles. The combination of Apache mod_auth_openidc with geoserver-jwt-headers-plugin provides an alternative to using the geoserver-sec-oauth2-openid-connect-plugin plugin.
We’d like to thank David Blasby (GeoCat) for this work on this module.
Developer Updates
ResourceStore / Paths API Change
Developers should keep in mind some important maintenance work performed by Niels Charlier on the use absolute and relative paths in the ResourceStore. See the Developers Guide for more information.
This does not affect end users.
Experimental Java 21 support
GeoServer, along with GeoTools and GeoWebCache, are now tested to build and pass tests with Java 21.
This is not yet an endorsement to run GeoServer in production with Java 21. We are looking ahead at the 2024 roadmap, and are making sure the basics are covered for the newer Java releases.
Full Release notes
New Feature:
- GEOS-11225 [AuthKey] AuthKey synchronize the user/group automatically
MapML:
- GEOS-10438 ENTITY_RESOLUTION_ALLOWLIST property not parsing empty setting
- GEOS-11207 Refactor MapML MVC controller as GetMap-based operation with standard parameter format
- GEOS-11221 mkdocs preflight rst fixes
- GEOS-11289 Enable Spring Security StrictHttpFirewall by default
- GEOS-11297 Escape WMS GetFeatureInfo HTML output by default
- GEOS-11300 Centralize access to static web files
Improvement:
- GEOS-11306 Java 17 does not support GetFeature lazy JDBC count(*)
- GEOS-11130 Sort parent role dropdown in Add a new role
- GEOS-11142 Add mime type mapping for yaml files
- GEOS-11148 Update response headers for the Resources REST API
- GEOS-11149 Update response headers for the Style Publisher
- GEOS-11152 Improve handling special characters in the Simple SVG Renderer
- GEOS-11153 Improve handling special characters in the WMS OpenLayers Format
- GEOS-11155 Add the X-Content-Type-Options header
- GEOS-11173 Default to using HttpOnly session cookies
- GEOS-11176 Add validation to file wrapper resource paths
- GEOS-11213 Improve REST external upload method unzipping
- GEOS-11222 Include Conformance Class for “Search” from OGC API - Features Part 5 proposal
- GEOS-11226 Enable JTS OverlayNG by default
- GEOS-11246 Schemaless plugin performance for WFS
- GEOS-11247 Avoid HTML annotations special status in APIBodyProcessor
- GEOS-11248 Move version header handling from APIBodyMethodProcessor to APIDispatcher
- GEOS-11260 JNDI tutorial uses outdated syntax
- GEOS-11288 Improve input validation in ClasspathPublisher
- GEOS-11289 Enable Spring Security StrictHttpFirewall by default
- GEOS-11298 When a Raster Attribute Table is available, expose its attributes in GetFeatureInfo
- GEOS-11327 Add warning about using embedded data directories
- GEOS-11334 Update MapML viewer to release 0.13.1
Bug:
- GEOS-11050 jdbc-store broken by changes to Paths.names
- GEOS-11051 Env parametrization does not save correctly in AuthKey extension
- GEOS-11145 The GUI “wait spinner” is not visible any longer
- GEOS-11182 Avoid legends with duplicated entries
- GEOS-11187 Configuring a raster with NaN as NODATA results in two NaN in the nodata band description
- GEOS-11190 GeoFence: align log4j2 deps
- GEOS-11203 WMS GetFeatureInfo bad WKT exception for label-geometry
- GEOS-11224 Platform independent binary doesn’t start properly with default data directory
- GEOS-11250 WFS GeoJSON encoder fails with an exception if an infinity number is used in the geometry
- GEOS-11278 metadata: only selected tab is submitted
- GEOS-11312 Used memory calculation fix on legend WMS request
- GEOS-11266 csw-iso: missing fields in summary response
- GEOS-11312 Inconsistent Memory Units in Legend Image Creation
- GEOS-11335 A layer in an authority other than EPSG may fail to reload after restart
Task:
- GEOS-11242 Remove the Xalan library
- GEOS-11315 Revert to CORS commented out
- GEOS-11318 Update postgresql to 42.7.2
- GEOS-11134 Feedback on download bundles: README, RUNNING, GPL html files
- GEOS-11141 production consideration for logging configuration hardening
- GEOS-11159 Update mapfish-print-lib 2.3.0
- GEOS-11180 Update ImageIO-EXT to 1.4.9
- GEOS-11181 Update jai-ext to 1.1.25
- GEOS-11186 Fix maven enforcer failFast
- GEOS-11220 Upgrade Hazelcast from 5.3.1 to 5.3.6
- GEOS-11245 Update OSHI from 6.2.2 to 6.4.10
- GEOS-11316 Update Spring version to 5.3.32
For the complete list see 2.25.0 release notes.
Community Updates
Community module development:
- GEOS-11305 Add layer information in the models backing STAC
- GEOS-11146 Fix MBTiles output format test
- GEOS-11184 ncwms module has a compile dependency on gs-web-core test jar
- GEOS-11209 Open ID Connect Proof Key of Code Exchange (PKCE)
- GEOS-11212 OIDC accessToken verification using only JWKs URI
- GEOS-11219 Upgraded mail and activation libraries for SMTP compatibility
- GEOS-11293 Improve performance of wps-lontigudinal-profile
- GEOS-11216 Create a datastore to produce graticules for WMS maps.
Community modules are shared as source code to encourage collaboration. If a topic being explored is of interest to you, please contact the module developer to offer assistance.
About GeoServer 2.25 Series
Additional information on GeoServer 2.25 series:
How to Publish a GeoTIFF file in GeoServer
GeoSpatial Techno is a startup focused on geospatial information that is providing e-learning courses to enhance the knowledge of geospatial information users, students, and other startups. The main approach of this startup is providing quality, valid specialized training in the field of geospatial information.
( YouTube | LinkedIn | Facebook | Reddit | X )
Publishing a GeoTIFF file in GeoServer
In this session, we want to talk about “How to Publish a GeoTIFF file in GeoServer” comprehensively. If you want to access the complete tutorial, simply click on the link.

Introduction
The GeoTIFF is a widely used geospatial raster data format, it is composed of a single file containing both the data and the georeferencing information. By default, GeoTIFF will be an option in the Raster Data Sources list when creating a new data store.
Note. In this blog post, we used GeoServer version 2.20.0.
Add a GeoTIFF data
To add a GeoTIFF data in GeoServer, follow these steps:
- Navigate to Data > Stores page, then click on the Add new Store link.
- Select the desired workspace from the drop-down menu.
- Enter the Data Source Name, make sure the Enabled option is checked. If checked, it enables the store. If unchecked (disabled), no data in the GeoTIFF will be served from GeoServer.
- In the URL under the Connection Parameters, browse to the location of the GeoTIFF file then press the Save button.
- Now you will be redirected to the New Layer page automatically and to add a layer for an available resource click on the Publish link.
- Check the Name, Coordinate Reference Systems and the Bounding Boxes fields are properly set and press the Save button.
Layer Groups
In Geoserver, a layer group serves as a convenient container for organizing layers and other layer groups in a structured hierarchy. By assigning a single layer to a layer group in WMS requests, the process of making requests is simplified as instead of specifying multiple individual layers, only one layer needs to be indicated. Furthermore, a layer group establishes a set order for the layers within it and enables the specification of alternative styles for the layers, distinct from their default settings.
Add a Layer Group
-
To create a Layer Groups, navigate to Data > Stores page. Click on Add a new layer group link. The initial fields allow you to configure the name, title, abstract and workspace of the layer group. Enter the
Data Source NameandTitle. -
The Enabled checkbox, if disabled, will cause the layer group to just show up at configuration time, while the Advertised checkbox, if unchecked, will make it to not be available in GetCapabilities request and in the layer preview. The behaviour of layer group regarding both checkboxes will not affect the behaviour of any of the layers being grouped, which will follow respectively that specified in the corresponding edit page.
Note. In the layer group section, Workspace selection is optional.
-
The Bound section contain the data BoundingBox of this layer group in the native coordinate reference system. The input can be done manually or automatically with the help of Generate Bounds.
Note. By default, a layer group is queryable when at least a child layer is queryable. Uncheck Queryable box if you want to explicitly indicate that it is not queryable independently of how the child layers are configured.
-
To add more layers to the Layer Group list, you can press the Add Layer… button at the top of the table. From the popup window, select the layer to be added by clicking the layer name.
-
A layer group can be added by pressing the Add Layer Group… button at the top of the table. From the list of layer groups, select the appropriate layer group’s name.
-
A style group is a style that has one or more Named Layers which reference layers that exist in the catalog. Style groups can be added to Layer Groups as an alternative way of defining a collection of styled layers. To add it, press the Add Style Group… button at the top of the table and from the popup window, select the style group to be added by clicking its name.
-
Press the generate bounds button to have geoserver compute the group bounds from the layers inside of it.
Note. A layer group can contain layers with dissimilar bounds and projections. GeoServer automatically reprojects all layers to the projection of the layer group.
-
When a layer group is processed, the layers are rendered in the order provided, so the publishable elements at the bottom of list will be rendered last and will show on top of the others. A publishable element can be positioned higher or lower on this list by pressing the green up or down arrows, respectively, or can be simply dragged in the target position.
-
Metadata links allows linking to external documents that describe the data of layer group. Keywords make possible to associate a layer group with some keywords that will be used to assist catalog searching.
-
Press Save button to create the new layer group.
Preview a Layer Group
So in order to preview the created layer, navigate to the Data > Layer Preview page and enter the name of your layer group in the search box, then press Enter button. Click on the OpenLayers link for a given layer and the view will display. An OpenLayers map loads in a new page and displays the group layer with the default styles. You can use the Preview Map to zoom and pan around the dataset, as well as display the attributes of features by click on each feature.
Using WMS layers in QGIS
To display a WMS layer in QGIS software, follow these steps:
- Open GQIS and navigate to Layer > Add Layer > Add WMS/WMTS Layer.
- To create a new service connection, from the Layers tab, press New button.
- Name your connection from the Connection Details. Next, from the
URLtextbox, you need to access a WMS layer as HTTP address of Web Map Server. In this case, name the connection asMy Projectand the URL ashttp://localhost:8080/geoserver/project/wmsand press OK. Note that the “project” refers to the workspace defined in Geoserver. - Press the Connect button to fetch the list of layers available, then press Add button and Close.
- Now, you will see the layer loaded in the QGIS canvas. You can zoom/pan around just like any other layer. The way WMS service works is that every time you zoom/pan, it sends your viewport coordinates to the server and the server creates an image for that viewport and return it to the client. So there will be some delay before you see the image for the area after you have zoomed in. Also, since the data you see is an image, there is no way to query for attributes like in a regular vector/imagery layer.
Tutorials
- How to create Tile Layers with GeoServer
- How to style layers using GeoServer and QGIS
- How to Publish a GeoTIFF file in GeoServer
- A Comprehensive Guide to Publishing a Shapefile in GeoServer
- GeoServer About & Status - A Practical Guide
- GeoServer installation methods on Windows
- Introducing GeoSpatial Techno with a Video Tutorial
- GeoServer Presentations on FOSS4G 2019